Showing posts with label [NFSHS]. Show all posts

Friday, December 29, 2023

NFS3/NFSHS Car Sound Tutorial

Note: this tutorial is made with the assumption you are familiarized with Audacity's interface and tools. If you don't I strongly recommend to read the program's manual here

    Intro

    There's a couple of car sound editing for NFSHS out there but I always had some trouble making sounds because they either had clicking in spite of following the steps (albeit adapted for Audacity), uneven looping or sounds sounding "muffled" compared to source. After messing around with samples and some hex editing (alongside the advent of new software for better BNK editing) I finally came up with a method to get consistently decent loops in-game and in addition, gathered some insight on NFS3 sound editing as well.

    Tools you'll need


    The BNK files structure

    NFS3 and NFSHS use sound bank files (.BNK) for car sounds; NFSHS has also the CARENG.CTB and CARENG.LTB files, which are presumed to tell the game which sample (or stream) of (S)CARENG.BNK use at what rpm since each car has a different set. NFS3 on the other hand has a simpler, standardized structure recycled from NFS2 (the only difference is that NFS3 CAR.BNKs might come with alternate streams which NFSWizard cannot read, but NFS2 .BNKs can be used as-is). 


    NFS3 car sound structure

    File Description Samples [streams] Notes
    car.bnk
    Player car sound bank
    1. Engine accelerating [0]
    2. Engine decelerating [1]
    3. Gear shift [2]
    4. Horn [3]
    • Samples 1, 2 and 4 are looped
    • Samples 1 and 2 are normally stereo but mono samples can be used without issues
    • Samples 1 and 2 might also come with alternate streams for interior sounds, though they aren't mandatory
    ocar.bnk
    Opponent car sound bank
    1. Engine accelerating [0]
    2. Horn [3]
    • Samples are looped
    ocard.bnk
    Opponent car sound bank (for Dolby sound, perhaps?) same as ocar.bnk
    same as ocar.bnk
    scar.bnk
    Player 2 in split-screen bank
    same as car.bnk
    same as car.bnk but all samples are mono


    NFSHS car sound structure (CLK-GTR sounds files)

    File Description Samples [streams] Notes
    careng.bnk
    Player car sound bank
    1. Gear shift [2]
    2. Horn [3]
    3. Idle (decelerating) [32]
    4. Low-RPM (decelerating) [33]
    5. Mid-RPM (decelerating) [34]
    6. High-RPM (decelerating) [35]
    7. Idle (accelerating) [48]
    8. Low-RPM (accelerating) [49]
    9. Mid-RPM (accelerating) [50]
    10. High-RPM (accelerating) [51]
    11. Idle (decelerating, interior) [64]
    12. Low-RPM (decelerating, interior) [65]
    13. Mid-RPM (decelerating, interior) [66]
    14. High-RPM (decelerating, interior) [67]
    15. Idle (accelerating, interior) [80]
    16. Low-RPM (accelerating, interior) [81]
    17. Mid-RPM (accelerating, interior) [82]
    18. High-RPM (accelerating, interior) [83]
    • All samples except 1 are looped
    • Samples 11 to 18 are normally stereo but mono samples can be used without issues
    ocareng.bnk
    Opponent car sound bank
    1. Engine accelerating [0]
    2. Horn [3]
    • Samples are looped
    scareng.bnk
    Player 2 in split-screen bank
    same as careng.bnk
    same as careng.bnk but all samples are mono
    careng.ltb
    careng.ctb
    presumably lookup tables for the (s)careng.bnk files


    Sample requirements

    NFS3/NFSHS audio samples do have some requirements in order to work correctly, mostly due to sound memory constraints. Such requirements are:
    • 22050 Hz sample rate
    • Can be mono or stereo
      • Stereo samples should be pitched down 50% compared to mono
    • Max length of samples vary per game but rule of thumb is to not exceed 1.2 seconds (NFSHS maximum) for mono samples, stereo samples are around half of that.

    In general terms, working with mono samples is easier than with stereo samples because of the latter two points.


    Why it was a massive PITA to get decent sound loops... until now

    (this is a rather lengthy theoretical part, so buckle up)
     
    In the simplest terms, it's because the sole program (until very recently) that could work with BNK files (NFSWizard) is ancient jank. NFS Wizard for some forsaken reason corrupts each audio sample at the beginning upon closing a BNK file; it appears it inserts some additional sample info data but it "pushes" audio data forward by fractions of a second, leading to the end of each sample "stomp" on the beginning of the next, creating a noticeable "click" on playback. That's why it was often advised to import all samples again every time you open a BNK file.

    Making matters more complicated, the sample looping interface in NFSWizard is just a couple of sliders; you can't punch the value you need there, hence it's very imprecise. The combination of both factors made getting loops right a near endless game of trial and error.

    However, not all is lost. As mentioned before, the end of each sample stomps on the beginning of the next one; that means one could put a bit of silence at the end of each sample so the "click" is (mostly) avoided. But that's not all: the loop points still have yet to be set and they can't be set precisely... unless you are willing to do some hex editing magic, like I did. 

    First I looked over into the Sample Info tab of NFSWizard to see if the loop info is there. After moving the loop points and looking at the tab, I found the two addresses that correspond to the loop points:  

    Then I exported the BNK file and opened it with a hex editor. I searched the addresses with the values, and lo and behold there are:

    Each looped sample has 2 addresses of 4 bytes each, one starts with 86 and the other with 87: these correspond to the loop points. The part we're interested is this one:

    "What the hell is a wave sample?", you might ask. Well, a wave sample is the basic unit of sound which varies with the sound frequency: in a 1 second-long 22050 Hz sound there are 22050 samples, for example. Which means 22 wave samples is equivalent to 0.001 seconds... which is about the amount the NFS3 samples get "shifted" around. (NFSHS sounds get shifted by 28 wave samples).

    Now you see the number I pointed out in red doesn't read 22 or anything of the sort, that's because it's a hexadecimal number; you have to convert your decimal numbers to those. Windows Calculator has a programmer mode that allows for such thing, so punching 22 in decimal mode should yield "16" in hexadecimal (or "1C" for 28). Changing the bytes in the space I pointed out to 00 16 and saving in the hex editor will set the starting loop to 22 wave samples (the end loop can be just be dragged all the way to the end in NFSWizard) and now I can import it back to NFSWizard.

    Do you have to do this for this tutorial? No, luckily for you I have uploaded sets of edited BNK files with the starting loop points fixed, linked above (or just use Vivianne, lmao). Though you might want as well to use the BNK horn loop tweaker for setting the horn samples precisely if you're using NFSWizard.

    Enough theoretical babble, let's get onto sourcing a sound sample.


    Step 1: Sourcing your samples

    You'll need to get your sounds from *somewhere* (duh), however there are a couple of considerations to take to get a decent sound:
    • You'll need to get a sound sample that's clean as possible. That means no echoing, no distortions, no foreign sounds like wind/road noise, etc.
    • It needs to be as steady as possible for at least 0.5-0.6 seconds; relatively minor pitch changes (such as accelerating/decelerating down a road) can be corrected with the Sliding Stretch tool.
    • If you can, get both acceleration and deceleration sounds. Otherwise just the acceleration sounds might suffice.

    Regardless, you can get your sounds by either recording them from another videogame (using OBS, Xbox Game Bar or Audacity's built-in loopback recorder) or by ripping it from some online video. In case you want to record it from another videogame, here's an excerpt adapted from Zpectre's first tutorial linked above:

    If you are using an analog device (like a gamepad or steering wheel), you first need to assign the throttle command to the Y axis. When the game asks you which key/button/command you want to use for the throttle, move the stick forward (I guess you all know how to do it) or press the right trigger. If you have a wheel, just use the pedals. After you customize your controls, start a race using manual transmission. When you are in control of the car, leave it at neutral gear. Now start pushing the throttle slowly until you reach an RPM value that is 1000-2000 RPM lower than the max RPM for the car (this gives better sounds). When you reach the value you want, keep the tachometer at it, then begin to record your sound. Make a 5-10 seconds long video, then stop recording.

    The second method is suitable for keyboard users and for some games which make distinction between engine and exhaust samples (like NFSU2 and NFSMW). You need to find a track with a section where the car will keep accelerating for some seconds, but won't increase RPM any further (for example, the small ramp before the first tollbooths in NFSMW's City Perimeter track). Start a race with the car you want on the track you think will be best to record sounds on, preferably with manual transmission (so you have more control over the RPM ranges). Before you reach the part of the track where the RPM will remain constant, start to record, then end it after you get the sound you wanted.
    Also it's worth adding:
    • As long as it's possible try to turn down all sounds that aren't the engine sound. In some cases you might have to mod the source game to achieve that.
    • Try to avoid recording supercharger/turbocharger sounds because they won't sound good on idle/lower revs. Again, try to turn them down/remove them. However, for NFSHS, you can also record one sound with supercharger/turbo and one without them for use with high/low rpms, respectively.
    • Avoid driving through tunnels and overpasses, the resulting echo effect can affect quality.
    • To use Audacity's loopback recorder, set the Host to Windows WASAPI, Recording Channels to "1  (Mono)", Project Sample Rate to 22050 Hz and Playback/Recording Device to your speakers or headphones (whichever is plugged) in Audio Settings. Then you can hit the Record button in the toolbar to start recording.
    • The resulting sounds might not be 100% accurate to the source sound, that's due NFS3/HS relatively primitive sound engine.

    If you're going to source sounds from internet videos, then you might have to do some legwork to get a decent one because many are not quite optimal. Flyby and dyno videos might give you a better chance but they might require additional editing that won't be covered in this tutorial. 


    Step 2: Preparing your base sounds

    Once you have your sound recorded/imported, it's time to make your base sounds. Just in case, save them as an Audacity project. Select 0.5-0.75 seconds of your recorded sounds and copy them into a new project. Then select the entirety of newly pasted sound and apply the following effects:
    • Volume and Compression > Amplify
      • Default values are usually fine but you can check the Allow clipping checkbox and set the Amplification value 1-2 dBs higher than the default
    • Volume and Compression > Limiter (or Legacy Limiter if you're on 3.6.2 and above)
      • Set Type to Soft Clip and Apply Make-up Gain to Yes
    • If you're working with a unsteady sound (like one from an accelerating/decelerating car) you can use Pitch and Tempo > Sliding stretch before using the Amplify and Limiter effects
      • Usually a value of (-)1 to (-)5 percent on one end does even out the sound.
    • Also if you want to make an interior engine sound out of your sound you can use EQ and Filters > Bass and Treble for that before using the Amplify and Limiter effects.
      • Usually a 15%-20% treble value does the job
    • In recent versions of Audacity, sections that peak too much ("clipping") will be shown as a red line; you can use Legacy Limiter in Hard Limiter mode to get rid of them
    After that you have to set the pitch of the base sample with Effects > Pitch and Tempo > Change speed and pitch; your target is what would sound best when played at 140% speed (NFS3) or 135% speed (NFSHS); the Playback-at-Speed toolbar pretty much helps with that. As a rule of thumb, here are the percent changes you'll usually have to use per game:
    • NFS3: -30 to -35 percent change
    • NFSHS: -15 to -25 percent change
    Sometimes after applying speed/pitch changes might result in distotions such as crackling or clipping; if that's the case, undo the speed/pitch change, use Volume and Compression > Amplify with a value of -0.5 to -1, apply speed/pitch changes again then use Legacy Limiter in Hard Limiter or Soft Clip mode to bring volume back up.

    When you're done, select your whole track, press Z to set the selection to zero points (the black line that's in the middle of the wave, this is important since that would avoid -most- instances of clicking), press Ctrl+T to trim the track and go to Tracks > Align Tracks > Start to zero to get rid of the empty space it might make. You might also want to delete any remaining sound after the 0.75 second mark by selecting it and pressing Ctrl+K.

    Save your base sound as an Audacity project because you will need to get back to it, especially if you're making a NFSHS sound


    Step 3: Making the engine sounds

    With the base sound done, copy it and paste it into a new project. Copy and paste it again, but in a new track this time and reverse it with the Special > Reverse effect. Move the new track towards the right and make sure there's at least a 0.2-0.25 second overlap between the tracks, like this:

    Also make sure the waves "match" as possible in order to not get your sound muted at the middle after the next step, you might want to zoom in with Ctrl+mouse wheel to check.

    Next select the overlapping parts of the tracks like this...
    ...then go to Effects > Fading > Crossfade tracks, set Fade TYPE to Constant Power 1 and click OK.

    Try out the track loop by selecting all tracks, enable looping by pressing L and set the loop to selection by pressing Shift+Alt+L and play it back. If you hear any noticeable click/gap, you can do any of the following:
    • Go back to the beginning of this step, select one bit of the beginning (mind the zero points), delete it with Ctrl+K and do the whole process again.

      -OR-

    • Use the Special > Invert effect on the reversed track.

    If you're using NFSWizard for importing the sounds: select your track, press the End key to bring the cursor to the end of the track, go to Generate > Silence, click on the arrow next to the Duration field to open the dropdown menu and select hh:mm:ss+samples. Set Duration to 00h 00m 00s + 00022 samples (for NFS3) or 00h 00m 00s + 00028 samples (for NFSHS) and click Generate . Select all tracks and press Ctrl+J to join them.


    Export your track by going to File > Export Audio , give it a filename and select a location to save it in, set format to WAV (Microsoft), set Channels to Mono, Sample Rate to 22050 Hz, Encoding to Signed 16-bit PCM and Export Range to Current Selection. Click on Export to export the file. 

    For opponent car sounds you can select the track, go to Effects > Volume and Compression > Amplify and use a -2 to -3 dB amplification so your opponent sounds don't drown the player's.

    For NFS3 you can proceed to the next step, but for NFSHS you have to make the rest of the sounds (mid, low, idle). Go back to the beginning of this step and proceed to do the following:
    • Select your track and go to Effects > Pitch and Tempo > Change speed and pitch. Apply the following percent changes for the following:
      • -20 for the mid-rpm sound
      • -40 for the low-rpm sound
      • -60 for the idle sound
    • (If needed) Press Z to set selection to zero points, trim it with Ctrl+T and align tracks to zero
    • Select any remaining sound past the 0.75 second mark and delete it with Ctrl+K

    Then proceed as usual.


    Step 4: Importing samples to the BNK file

    If you're using Vivianne:

    1. Open your car.viv file.
      • For best results, use the edited BNK files; open the file containing the edited BNKs in Vivianne, export all the files. Then open your car.viv file and import the files you exported by clicking on the + button on the file list of the left.
    2. Open the CAR.BNK/CARENG.BNK file. Select the first engine sound stream, click on Import and import your sample.
    3. Click on Add audio padding and add a padding of 1. This is because currently Vivianne does not write the loop start data if it's set to 0 and it might break the file.
    4. Repeat this process for the rest of the engine sound streams in the BNK file. For streams 64 to 83 (interior accel/decel sounds) you might want to use the Inject padding bytes button with their default values to avoid breaking the file. Save the BNK file.
    5. Repeat steps 2 and 3 with the opponent (OCAR/OCARGENG) BNK file.
    6. Once done, you can duplicate the CAR/CARENG.BNK file into a SCAR/SCARENG.BNK file for splitscreen player 2 sounds and for NFS3, the OCAR.BNK into OCARD.BNK. Save your car.viv file, you're done.

    If you're using NFS Wizard:

    1. Open the .VIV file containing the edited BNKs and your car.viv file in NFS Wizard. Go to Window > Tile Vertically to set both windows side to side and drag the files from the edited file's VIV to your CAR.VIV.
    2. Close the edited BNKs .VIV file and open the CAR.BNK/CARENG.BNK file. Select the first engine sound, right click on it and make sure Show Loop is enabled. Press Ctrl+I to import a sound file and select your engine sound.
    3. Once imported, click and drag the ending loop marker all the way to the right edge of the window.
    4. Repeat this process for the rest of the engine sound samples in the BNK file and close it. Then repeat this step with the opponent (OCAR/OCARGENG) BNK file.
    5. Once done, you can duplicate the CAR/CARENG.BNK file into a SCAR/SCARENG.BNK file for splitscreen player 2 sounds and for NFS3, the OCAR.BNK into OCARD.BNK. Save your car.viv file, you're done.
    Remember that if for some reason you have to reimport samples, you have to reimport all of them, so it's advised to have the gear shift and horn samples exported at hand.

    That's it for this tutorial, hope you get neat sounds out of it. See you around!

    Thursday, January 5, 2023

    How to make NFSHS photo album banner and slides

    In this tutorial you will learn how to make the photo album banner and slides for your car in a style that's quite close to the one used in the vanilla game's ones.

      Stuff you'll need

      • GIMP [portable] - image editor (version 2.10 shown; while you will still be good if you're using the latest version -3.0.4 at the time- you can use the GIMP 3 version of the template instead, which has several filters pre-applied as non-destructive effects)
      • My NFSHS photo album banner and slide templates
      • FSHTool [download] - QFS/FSH file unpacker/packer, for slides and vidwalls

      GIMP's user interface

      If you're not famliarized with GIMP, I will give you a quick rundown of the UI so you can get yourself acquainted with it. Here's the default UI for version 2.10


      1. Toolbox: here's where you will find most of the tools used for editing, like selection, paintbrush, bucket fill, text, etc. By default tools are grouped into several groups (which are indicated by the small arrows on the bottom right of the buttons); to select another tool in the group, right-click on the button to display the available tools in that tool to select them. Also, you can select the foreground and background colors (the black and white squares, respectively)
      2. Tool options/Information/Undo history/Recent files tabs: for this tutorial we're just going to focus on the Tool options; here's where the selected tool's parameters can be configured.
      3. Brushes/Patterns/Fonts/Messages tabs: not important for this tutorial.
      4. Layers/Channels/Paths tabs: here's when you can manage the image layers, channels and paths. We'll just focus on layers. 

      Step 1: Uncompressing the .qfs files

      1. Unzip FSHTool into a folder
      2. Copy the data\showcase\art\<manu>.qfs and the data\showcase\art\sl<car id>##.qfs files from the game's folder into the FSHTool folder
        • <manu> stands for the first 4 digits of the car's manufacturer name in the FEDATA files (i.e. a car with a manufacturer name of "Toyota" would have a "toyo.qfs" file for the banner file)
        • <car id> stands for the car's ID folder name in data\cars (which is often the same as in the FEDATA file -i.e. Ccor-)
        • ## stands for the slide number, starting from 01, copy as many as you need
      3. Now either drag the .qfs files into the FSHTool.exe file to uncompress them; a new folder with the file name will be generated for each file.

      Step 2: Making the logo banner

      1. Unzip the contents of the templates zip file to a folder and open the nfshs_photoalbum_banner_template.xcf file in GIMP. Select the logo layer in the front group by clicking on its name in the Layers pane.


      2. Get a logo with transparency (preferably a black monochrome one) of your car's manufacturer, open it in GIMP, copy it and paste it on the template's logo layer.
        • If you only have access to a black and white logo with no transparency, you can use the Colors > Color to Alpha command to make the background color transparent
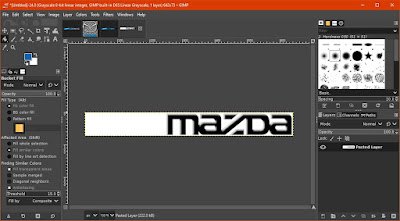
        • If your logo comes in other color than black, you can lock the transparency by clicking on the checkerboard button above the layer list and fill it up with black by picking the Bucket Fill (Shift+B) tool and shift clicking on the logo to color it.
        • If the logo is just a part of your source image, you can select it with the Rectangle Select (R) tool, copy it, paste it, unlock the transparency then crop off the empty borders with Layer > Crop to Content, cut it and paste it on the template.


      3. Pick the Unite Transform (Shift+T) tool and resize the layer you pasted until it fits either between the top and bottom or the left and right guides (cyan dotted lines) by clicking and dragging on the squares alongside the logo's border (you can lower the Image Opacity parameter to 50 in the Tool Options pane to help yourself); Ctrl-click and dragging them will resize the layer while keeping it centered. You can also move the layer by just clicking and dragging it. Once you're done, press the Transform button or press the Enter key, then press the anchor button in the layers pane (or press Ctrl+H) to anchor the pasted selection to the layer below. You can zoom in or out as needed with Ctrl+mouse wheel or the +/- keys. Press Ctrl+H to anchor the layer when you're done.


      4. Right-click on the logo layer and click on Alpha to selection, then press Ctrl+I to invert the selection. Select the shadow layer, pick the Move (M) tool, hold Alt and click+drag the selection 3 pixels to the right and bottom. Then, pick the Bucket Fill (Shift+B) tool, select a black color for the foreground and Shift+click on the selection to fill it it with the color.


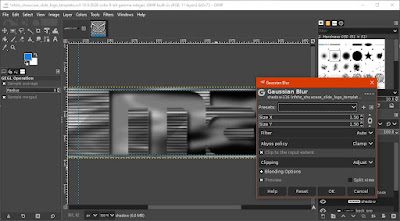
      5. Deselect your selection by pressing Ctrl+Shift+A, then go to Filters > Blur > Gaussian Blur, set these values and click OK to apply the blur.


      6. Select the color layer in the front_grp group, pick the Bucket Fill tool, select the color you want (preferably one that matches your vidwall) and click on the layer to fill it with said color.


      7. Select the color_back layer in the back_grp group, and fill it with a slightly different/darker color.


      8. Hide the front_grp group by clicking on the eye icon next to it, now export the background. To do so, go to File > Export (Ctrl+E) or File > Export As (Ctrl+Shift+E). Save it as 0002.bmp in the <manu> folder of the qfs file you uncompressed with FSHTool. When the export options dialog shows up, use the settings shown below and click on Export.


      9. Hide the back_grp and unhide the front_grp group, then copy the visible image with Ctrl+Shift+C, then paste it into a new image with Ctrl+Shift+V


      10. Go to Layer > Mask > Add Layer Mask, select Transfer layer's alpha channel and click Add


      11. Press Ctrl+X to cut the newly added mask and paste it into a new image with Ctrl+Shift+V


      12. Export the mask image as 0001-a.bmp file in the <manu> folder with these settings


      13. Go back to the pasted image and export it as 0001.bmp file in the <manu> folder with these settings

      14. Go back to the banner template, copy the visible image with Ctrl+Shift+C and paste it into another new image with Ctrl+Shift+V, then go to Layer > Transparency > Threshold Alpha, set the values below and click OK.


      15. Repeat steps 10 through 13 for this one, export the newly pasted mask as 0004-a.bmp and the newly pasted banner as 0004.bmp in the <manu> folder. You're done with the logo banner for both hardware and software versions.

      Step 3: Making the slides

      1. Open the nfshs_photoalbum_slide_template.xcf file in GIMP. Select the image layer, paste the image you want to use for the slide, then use the Unite Transform tool to resize, rotate (by clicking and dragging outside the selection) and place it. When you're done, click on Transform and press Ctrl+H to anchor the layer.


      2. The first slide has the model's logo on it, so go to the logo_main layer and paste the model logo (preferably a white monochrome one) in there, then use the Unite Transform tool to resize it and place it into the upper left corner (using the guides to help yourself place it) and anchor the layer when you're done.


      3. Right-click on the logo_main layer in the Layers pane and click on Alpha to Selection, then go to Select > Grow Selection, select a value of 2 and click OK. Select the logo_shadow layer, pick the Bucket Fill tool, pick a black color and click on the selection to fill it.


      4. Deselect your selection with Ctrl+Shift+A, then go to Filters > Blur > Gaussian Blur, set the values shown below and click OK


      5. Export this first slide. To do so, go to File > Export (Ctrl+E) or File > Export As (Ctrl+Shift+E). Save it as 0000.bmp in the sl<car id>01 folder of the qfs file you uncompressed with FSHTool. When the export options dialog shows up, use the settings shown below and click on Export.


      6. To make the rest of the slides, hide the logo group, then select the image layer and repeat step 1, but instead of anchoring the layer, make the newly pasted image into a new layer by pressing Ctrl+Shift+N. Then export the slide as 0000.bmp in each remaining sl<car id>## folder with the settings above.

      Step 4: Compiling the logo and slide files and setting them in-game

      1. Go to the <manu> and each sl<car id>## folder, then drag the index.fsh file into the FSHTool executable (you might need to open a second window to do this)
      2. Copy the <manu> and sl<car id>##.qfs files and paste them into the data\showcase\art folder of NFSHS

      And that's it! This is how you can make NFSHS-styled photo albums. Hope this tutorial has been helpful. 


      See you around!


      Wednesday, October 13, 2021

      How to make NFSHS-styled track slides and vidwalls

      In this tutorial you will learn how to make a track slide and vidwall in a style that's quite close to the one used in the vanilla game's ones.

        Stuff you'll need

        • GIMP [portable version] - image editor(version 2.10 shown; while you will still be good if you're using the latest version -3.0.4 at the time- you can use the GIMP 3 version of the template instead, which has several filters pre-applied as non-destructive effects)
        • My set of track slide/vidwall templates
        • FSHTool [download] - QFS/FSH file unpacker/packer, for slides and vidwalls
        • OPTI Iambic Heavy Italic font [download]
        I will use Code 4's Atlantic Forest Final as the example for this track since it's a great track and deserves a proper slide/vidwall set.

        GIMP's user interface

        If you're not famliarized with GIMP, I will give you a quick rundown of the UI so you can get yourself acquainted with it. Here's the default UI for version 2.10


        1. Toolbox: here's where you will find most of the tools used for editing, like selection, paintbrush, bucket fill, text, etc. By default tools are grouped into several groups (which are indicated by the small arrows on the bottom right of the buttons); to select another tool in the group, right-click on the button to display the available tools in that tool to select them. Also, you can select the foreground and background colors (the black and white squares, respectively)
        2. Tool options/Information/Undo history/Recent files tabs: for this tutorial we're just going to focus on the Tool options; here's where the selected tool's parameters can be configured.
        3. Brushes/Patterns/Fonts/Messages tabs: not important for this tutorial.
        4. Layers/Channels/Paths tabs: here's when you can manage the image layers, channels and paths. We'll just focus on layers and paths.

        Step 1: Uncompressing the .qfs files

        1. Unzip FSHTool into a folder
        2. Copy the data\feart\slides\t##_00.qfs and the data\feart\vidwall\t##.qfs files from the game's folder into the FSHTool folder
          • The ## stands for the track number, here's the list of numbers with their corresponding track:
            Track #
            Track name
            Track folder
            0
            Landstrasse
            GERMANY
            1
            Celtic Ruins
            HILLS
            2
            Route Adonf
            FRANCE
            3
            Durham Road
            UK
            4
            Dolphin Cove
            COASTAL
            5
            Kindiak Park
            PARK
            6
            Snowy Ridge
            SNOWY
            7
            Raceway
            GT1
            8
            Raceway 2
            GT2
            9
            Raceway 3
            GT3
            10
            Hometown
            HOMETOWN
            11
            Redrock Ridge
            REDROCK
            12
            Atlantica
            ATLANTICA
            13
            Rocky Pass
            ROCKYPAS
            14
            Country Woods
            COUNTRY
            15
            Lost Canyons
            LOSTCANY
            16
            Aquatica
            AQUATICA
            17
            Summit
            SUMMIT
            18
            Empire City
            EMPIRE
        3. Now either drag the .qfs files into the FSHTool.exe file to uncompress them; a new folder with the file name will be generated for each file.

        Step 2: Making the slide background image

        1. Take a screenshot of the track in-game; remember to disable the HUD with F5 first.
          • Also I recommend to take it under the highest resolution possible.
        2. Make sure you have installed the OPTI Iambic Heavy Italic font.
        3. Unzip the files of the templates to a folder and open the track_vidwall.xcf file in GIMP. Select the base layer in the trackimg group by clicking on its name in the Layers pane.

        4. Open the screenshot you took and resize (go to Image > Scale Image) it to 640px wide if neccesary. Then copy it (Ctrl+C) and paste it (Ctrl+V) into the base layer of the template. You'll see there's a white dotted border which is the selection and in the Layers pane there is a Floating Selection layer; that's what we've pasted. Pick the Move (keyboard: M) tool in the toolbox, then click and drag the layer to adjust it; hold Ctrl while dragging to keep it sticked to the image edges.

        5. When you're done, anchor the selection to the layer below (base) by going to Layer > Anchor Layer (Ctrl+H). You will see the yellow dotted border, which is the layer boundary will change size; we don't want that since we'll need all the layers in that group to have the same size.

        6. Select the trackimg group by in the Layers pane, then go to Layer > Mask > Mask to selection. Go back to the base layer. You will see the selection now fits the image; now we'll crop it to that selection by going to Layer > Crop to selection. The layer size is now adjusted to the selection.

        7. It's time to adjust the image contrast; to do so go to Colors > Curves. Adjust the curve a little like this (moving the bottom left point towards the right will make the darkest colors in the image darker and moving the upper right point towards the left will make the brightest colors brighter. When you're done, click OK .

        8. Copy the layer (Ctrl+C), switch to the blur layer and paste it (Ctrl+V) in there. Now go to Filters > Blur > Zoom Motion Blur. Move the crosshair to set where the blur center will be, adjust the blurring factor between 0.100 and 0.150, and set the Clipping to Clip. Click OK when you're done. Copy (Ctrl+C) the layer, switch to the add+blur layer and paste (Ctrl+V) into it. Also, deselect the selection by pressing Ctrl+Shift+A.

        9. Switch to the colortint layer, then click on the foreground color in the toolbox to open up the color picker dialog. Click on the HSV button, then pick a color with around  50 S(aturation) and 75 V(alue). Click OK to select it.

          Now pick the Bucket Fill (Shift+B) tool and click on the image to paint the layer for the color tint. Then pick a color with 100 Saturation and Value, go to the gradientcolor layer and click right in the middle of it to paint the gradient above and below the track picture. You should end up with a similar result as this:

        Step 3: The track name text

        1. Pick the Text (T) tool in the Toolbox, then go to the <track name> layer and triple-click on it to select all the text; type the track name afterwards, the layer name will change as well.

        2. Hide the track name layer by clicking on the eye icon next to it, then go the nameshadow layer and change its name like we did with the track name one; if the name goes out of bounds, just place the mouse on the right side of the textbox till you see a small orange rectangle and click on it to automatically adjust the textbox size to the text.


        3. Unhide the track name layer and go to the textdeg_colorpick layer. Pick the Color Picker (O) tool and click on the white square to set it as the foreground color, then Ctrl+click the cyan square to set it as the background color. Next, pick the Gradient (G) tool, go to the textdeg layer and click-drag over the length of the text, like in the following image. When you're done, press Enter to apply the gradient.
          • You can zoom in and out with Ctrl+mouse wheel or with the + - keys


        Step 4: The track map

        1. Take a screenshot of the track map in-game. To do so:
          • Set the map to Full Screen and at the farthest zoom possible in Heads Up Display Options
          • Start a race, switch to bumper cam and turn 90 degrees facing a dark wall; drive up close to it.
          • For better results, set track time to night and turn off your car lights with the L key
        2. Open the screenshot and pick the Select by Color (Shift+O) tool. Set the threshold to 75 and click on the track map to select it (you might have to zoom in). If there's anything else than the map selected, you can pick the Rectangle Select (R) tool and Ctrl-click and drag to deselect the parts you don't want.


        3. Go to Select > Grow, set how many pixels you want to grow the selection (that will depend on how big and complex your map is, alongside resolution; I will pick 1px for mine) and click OK. You will see the selection is now thicker

        4. Pick the Free Select (F) tool, then deselect the parts of the map you don't need by Ctrl-clicking and making a shape around those; press Enter to confirm the deselection. Then bridge the gap that's missing by Shift+clicking, selecting in a way that bridges the gap and press Enter when done

        5. Go to the Select > To Path, you will see now a red outline lies in place of our selection; that's a path.

        6. Pick the Elliptical Selection (E) tool and make a selection right where the dot of your car is in the map; Ctrl+drag when making the selection to make a perfect circle; move said selection towards the middle of the path we made if neccesary and make a path out of the selection


        7. Now go to Layer > New Layer... (Ctrl+Shift+N). Name the layer course and click on OK. Make sure you have white as foreground color (you can reset the default colors by pressing the D key or clicking on the small two squares on the lower left side of the color selector, then switch the foreground/background colors around by clicking on the arrows on the upper right of the color selector or pressing the X key); then switch to the Paths tab and right-click on the path of the track course, click on Fill Path, choose Solid Color and click on Fill. You will see now there's the path is now filled.

        8. Make a new layer called start and repeat the process with the other path. When you're done, you can hide the paths in the same way you can hide layers. Also, resize the image to 640x480 px if neccesary.

        9. Copy (Ctrl+C) the course layer, then go back to the template file and paste it (Ctrl+V) into the mapbase layer and anchor it. Then go back to the map file, copy the start layer, paste it in the mapbase layer, but this time press Ctrl+Shift+N to make a new layer out of it.

        10. Go to the map group, then pick the United Transform (Shift+T) tool and resize (by clicking and dragging the edge handles) and rotate (by clicking and dragging outside the box) the group as needed. When done, press Enter.

        11. Go to Layer > Crop to Content to crop out the empty space off the map, pick the Alignment (Q) tool and first click on the track image, then Shift+click on the track map. Now press the Align center to target and the Align middle of target buttons to align the track map to the track image.

        12. Go to the mapbase layer, then go to Filters > Distort > Emboss. Use the settings displayed here and click OK.

        13. Go to the start layer, lock the alpha channel by click on the 3rd icon to the right of the "Lock" text right over the layer list (it's the checkerboard one), pick the Gradient (G) tool, set the shape to Conical (symmetrical), pick white as foreground color and a dark gray as background color. Click and drag from the center of the start point like in the image and press Enter when done.

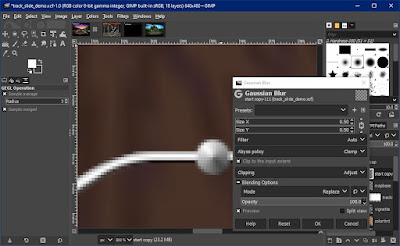
        14. Go to Filters > Blur > Gaussian Blur and use the settings below to smooth out the start point, click OK to apply the blur.

        15. Go back to the mapbase layer, go to Layer > Transparency > Alpha to Selection, then go to Selection > Grow and grow the selection by 2 or 3 px. Make a new layer called mapshadow and put it below the mapbase layer (by dragging it below it or using the arrow buttons under the layer list). Pick black as the foreground color and paint the selection with the Bucket Fill (Shift+B) tool, deselect everything by pressing Ctrl+Shift+A, then go to Filters > Blur > Gaussian Blur, set a blur of 3 and click OK. Repeat this process with the start layer.

        16. Make a new layer and name it color, pick a foreground color with 75 saturation and 50 color then use the Bucket Fill (B) tool to color the layer. Set the layer mode to Overlay. We're done with the track slide.

        17. To save the track slide, go to File > Export (Ctrl+E) or File > Export As (Ctrl+Shift+E). Save it as 0000.bmp in the T##_00 folder of the qfs file you uncompressed with FSHTool. When the export options dialog shows up, use the settings shown below and click on Export


        Step 5: Creating the vidwall

        1. Open the track_vidwall.xcf file, then proceed to make the track image like we did in Step 2; the only difference is that you'll have to resize the track image to 381 pixels wide.

        2. Pick the Text (T) tool, select the trackname layer, triple-click on it and type the track name. Then pick the Move (M) tool and move the layer towards the middle vertical cyan dotted line (a guide) until the center snaps to it.

        3. Go to Layer > Transparency > Alpha to Selection, then to Selection > Grow and grow the selection by 5 pixels. Go to the shadow layer, paint it black with the Bucket Fill (Shift+B) tool, deselect everything (Ctrl+Shift+A), then go to Filters > Blur > Gaussian Blur, set the blur to 5 and click OK


        4. Go to the colortint layer, pick a foreground color with 70 Saturation and 50 Value and paint the layer with the Bucket Fill (Shift+B) tool.

        5. To save the vidwall, go to File > Export (Ctrl+E) or File > Export As (Ctrl+Shift+E). Save it as 0000.bmp in the T## folder of the qfs file you uncompressed with FSHTool. When the export options dialog shows up, use the settings shown below and click on Export


        Step 6: Compiling the .qfs files and setting them in-game

        1. Go to the T##_00 folder and drag the index.fsh file into the FSHTool executable (you might need to open a second window to do this)
        2. Go to the T## folder and drag the index.fsh file into the FSHTool executable (you might need to open a second window to do this)
        3. Copy the t##_00.qfs file and paste it into the data\feart\slides folder of NFSHS (make backups first!)
        4. Copy the t##.qfs file and paste it into the data\feart\vidwall folder of NFSHS (make backups first!)
        And that's it! This is how you can make NFSHS-styled track slides and vidwalls. Hope this tutorial has been helpful.

        See you around!