First of all:
This tutorial is intended only for mods you created or personal use. Do not attempt to upload cars converted from other authors as yours without prior permission since we can tell whether a car is stolen by looking at meshes, file sizes and hashes. You have been warned.
Things you will need:
- NFSMW Unlimiter [download] - needed to make add-on cars work properly.
- NFS-CarToolkit [download] - tool to compile car geometry and textures
- Binary [download] - edits GlobalB.lzc, FrontB.lzc, language files and others
- VLTEd [download] - edits VLT database
- NFSTexEd 1.7 [download] - import/extract textures from .bin/.bun/.lzc files
Optional:
- AntRenamer [download | portable] - a little useful program for renaming multiple files
- MWInside's ReCompiler v190609 [download] - recompiles models and textures, adds cars to globalb.bun/lzc, logos to fronta.bun, strings to language files. (however, for adding cars it's being deprecated in favor of Binary)
- Base files for ReCompiler by nlgzrgn [download] - basic file structure for recompiler
- Save Patcher by MWInside [download] - to patch existing saves with addon cars
- NFS-Hasher [download] - to calculate the hashes needed for the ini file
Note: the bracketed (< >) terms are meant to be substituted without brackets (duh) and respecting their own capitalization. So for example <MANUFACTURER> is substituted for HONDA and <color> gets substituted by green
Step 1: File Structure
Make sure to install you have installed the NFSMW Unlimiter first or the add-on cars won't work properly
If you're going to add cars with Binary & CarToolkit
Skip to Step 2, there's no need for set up folders if you use Binary & CTK.
If you're going to add cars with Binary & Recompiler (for when CarToolkit can't open geometry files)
Unzip the Recompiler and recompiler base files in a folder. There are also a few files and folders that should be created or added as shown here:

- <OLD_XNAME> is the original car's xname -duh- (ie: PUNTO)
-
- Config.ini contents are the following:
[INFO]
NewName = <XNAME>
- Config.ini contents are the following:
The logo files can be extracted from the FRONTEND\MANUFACTURERS\<##>-<MANUFACTURER>.BIN (if it has one) and CARS_REPLACE\<XNAME>\SECONDARYLOGO.BIN with NFS TexEd.
Now proceed to step 2
If you're going to add cars with Ed The Car Dealer (deprecated method)
Download Ed The Car Dealer [download] first
Unzip the Recompiler and recompiler base files in a folder. There are also a few files and folders that should be created or added as shown here:
- <OLD_XNAME> is the original car's xname -duh- (ie: PUNTO)
-
- Config.ini contents are the following:
[INFO]
NewName = <XNAME>
- Config.ini contents are the following:
Unzip the Ed files into another folder. There's a lot of files and folders for Ed, but these are the ones we need:

-
<XNAME>.ini contents are the following (taken directly from the example file):
// Rename the file as CARNAME.ini, CARNAME being the folder name (XName) you use for your add-on car.
Color charts for reference:
[INFO]
Manufacturer = FORD // Type your manufacturer name here. (15 characters max.)
//Class = Racing // (Added for ReCompiler intercompatibility. You can either use this or the 2 values below.) Racing, Racers, Player, Cop, Cops, Traffic, BigTraffic, HugeTraffic
UsageType = 0 // 0 = Racer, 1 = Cop, 2 = Traffic, 3 = Wheels, 4 = Universal
CarMemType = Racing // Racing, Player, Cop, Traffic, BigTraffic, HugeTraffic
Skinnable = 1 // 0 = Uses own skin (CARNAME_SKIN1), 1 = Supports Paint & Vinyls.
DefaultBasePaint = GLOSS_L1_COLOR17 // GLOSS_L1_COLOR01 (01-80) / METAL_L1_COLOR01 (01-80) / PEARL1_PAINT (1-20) / CHROME01_PAINT (01-10) / MATTE01_PAINT (01-10) / TRAFFIC_L1_COLOR01 / COP_L1_COLOR01
[SPOILER]
SpoilerSet = SPOILER // SPOILER, SPOILER_CARRERA, SPOILER_HATCH, SPOILER_PORSCHES
AutosculptSpoilerSet = SPOILER_AS2 // SPOILER_AS2, SPOILER_CARRERA_AS2, SPOILER_HATCH_AS2, SPOILER_PORSCHES_AS2 (not used in MW)
[COLLISION]
CopyFrom = MUSTANGGT // Select any collision data to copy. Use any sentinel value to ignore copying.
[RESOURCES]
Description = Write your description here. // This will appear in Ed.
Label = CARNAME_MANUFACTURER_MODEL // String label for your new car. Replace MANUFACTURER and MODEL according to your FrontEnd VLT entry.
Name = Car Name // This will be your car's name.


-
<MANUFACTURER> (i.e.: FORD) and <FRONTEND_NAME> (i.e: MUSTANGGT) refer to the manufacturer and frontend nodes of the car in VLT, it's recommended to leave the frontend name the same as the xname to avoid confusion
- The dds files can be extracted from the FRONTEND\MANUFACTURERS\<##>-<MANUFACTURER>.BIN (if it has one) and CARS_REPLACE\<XNAME>\SECONDARYLOGO.BIN with NFS TexEd.

If you're going to add cars with ReCompiler (even more deprecated method)
Unzip the Recompiler (get the old version first, unzip it and then unzip the new version over the old one) and recompiler base files in a folder. There are also a few files and folders that should be created or added as shown here:

-
<OLD_XNAME> is the original car's xname
- Config.ini contents are the following:
[INFO]
NewName = <XNAME>
- Config.ini contents are the following:
- <MANUFACTURER> (i.e.: FORD) and <FRONTEND_NAME> (i.e: MUSTANGGT) refer to the manufacturer and frontend nodes of the car in VLT, it's recommended to leave the frontend name the same as the xname to avoid confusion
-
<XNAME>.ini contents are the following
[INFO]
Manufacturer = <MANUFACTURER>
Class = Racers / Cops / Traffic
Color = <color hash (w/o spaces)>- Color hashes are the following:
GLOSS PAINT :

COLORS 1-20 (FIRST ROW):

E2 BD BC B8 1/80
E3 BD BC B8 2/80
E4 BD BC B8 3/80
E5 BD BC B8 4/80
E6 BD BC B8 5/80
E7 BD BC B8 6/80
E8 BD BC B8 7/80
E9 BD BC B8 8/80
EA BD BC B8 9/80
02 BE BC B8 10/80
03 BE BC B8 11/80
04 BE BC B8 12/80
05 BE BC B8 13/80
06 BE BC B8 14/80
07 BE BC B8 15/80
08 BE BC B8 16/80
09 BE BC B8 17/80
0A BE BC B8 18/80
0B BE BC B8 19/80
23 BE BC B8 20/80

COLORS 21-40 (SECOND ROW):

24 BE BC B8 21/80
25 BE BC B8 22/80
26 BE BC B8 23/80
27 BE BC B8 24/80
28 BE BC B8 25/80
29 BE BC B8 26/80
2A BE BC B8 27/80
2B BE BC B8 28/80
2C BE BC B8 29/80
44 BE BC B8 30/80
45 BE BC B8 31/80
46 BE BC B8 32/80
47 BE BC B8 33/80
48 BE BC B8 34/80
49 BE BC B8 35/80
4A BE BC B8 36/80
4B BE BC B8 37/80
4C BE BC B8 38/80
4D BE BC B8 39/80
65 BE BC B8 40/80

COLORS 41-60 (THIRD ROW):

66 BE BC B8 41/80
67 BE BC B8 42/80
68 BE BC B8 43/80
69 BE BC B8 44/80
6A BE BC B8 45/80
6B BE BC B8 46/80
6C BE BC B8 47/80
6D BE BC B8 48/80
6E BE BC B8 49/80
86 BE BC B8 50/80
87 BE BC B8 51/80
88 BE BC B8 52/80
89 BE BC B8 53/80
8A BE BC B8 54/80
8B BE BC B8 55/80
8C BE BC B8 56/80
8D BE BC B8 57/80
8E BE BC B8 58/80
8F BE BC B8 59/80
A7 BE BC B8 60/80

COLORS 61-80 (FOURTH ROW):

A8 BE BC B8 61/80
A9 BE BC B8 62/80
AA BE BC B8 63/80
AB BE BC B8 64/80
AC BE BC B8 65/80
AD BE BC B8 66/80
AE BE BC B8 67/80
AF BE BC B8 68/80
B0 BE BC B8 69/80
C8 BE BC B8 70/80
C9 BE BC B8 71/80
CA BE BC B8 72/80
CB BE BC B8 73/80
CC BE BC B8 74/80
CD BE BC B8 75/80
CE BE BC B8 76/80
CF BE BC B8 77/80
D0 BE BC B8 78/80
D1 BE BC B8 79/80
E9 BE BC B8 80/80

METALLIC PAINT :

COLORS 1-20 (FIRST ROW):

4D 88 F2 C7 1/80
4E 88 F2 C7 2/80
4F 88 F2 C7 3/80
50 88 F2 C7 4/80
51 88 F2 C7 5/80
52 88 F2 C7 6/80
53 88 F2 C7 7/80
54 88 F2 C7 8/80
55 88 F2 C7 9/80
6D 88 F2 C7 10/80
6E 88 F2 C7 11/80
6F 88 F2 C7 12/80
70 88 F2 C7 13/80
71 88 F2 C7 14/80
72 88 F2 C7 15/80
73 88 F2 C7 16/80
74 88 F2 C7 17/80
75 88 F2 C7 18/80
76 88 F2 C7 19/80
8E 88 F2 C7 20/80

COLORS 21-40 (SECOND ROW):

8F 88 F2 C7 21/80
90 88 F2 C7 22/80
91 88 F2 C7 23/80
92 88 F2 C7 24/80
93 88 F2 C7 25/80
94 88 F2 C7 26/80
95 88 F2 C7 27/80
96 88 F2 C7 28/80
97 88 F2 C7 29/80
AF 88 F2 CF 30/80
B0 88 F2 C7 31/80
B1 88 F2 C7 32/80
B2 88 F2 C7 33/80
B3 88 F2 C7 34/80
B4 88 F2 C7 35/80
B5 88 F2 C7 36/80
B6 88 F2 C7 37/80
B7 88 F2 C7 38/80
B8 88 F2 C7 39/80
D0 88 F2 C7 40/80

COLORS 41-60 (THIRD ROW):

D1 88 F2 C7 41/80
D2 88 F2 C7 42/80
D3 88 F2 C7 43/80
D4 88 F2 C7 44/80
D5 88 F2 C7 45/80
D6 88 F2 C7 46/80
D7 88 F2 C7 47/80
D8 88 F2 C7 48/80
D9 88 F2 C7 49/80
F1 88 F2 C7 50/80
F2 88 F2 C7 51/80
F3 88 F2 C7 52/80
F4 88 F2 C7 53/80
F5 88 F2 C7 54/80
F6 88 F2 C7 55/80
F7 88 F2 C7 56/80
F8 88 F2 C7 57/80
F9 88 F2 C7 58/80
FA 88 F2 C7 59/80
12 89 F2 C7 60/80

COLORS 61-80 (FOURTH ROW):

13 89 F2 C7 61/80
14 89 F2 C7 62/80
15 89 F2 C7 63/80
16 89 F2 C7 64/80
17 89 F2 C7 65/80
18 89 F2 C7 66/80
19 89 F2 C7 67/80
1A 89 F2 C7 68/80
1B 89 F2 C7 69/80
33 89 F2 C7 70/80
34 89 F2 C7 71/80
35 89 F2 C7 72/80
36 89 F2 C7 73/80
37 89 F2 C7 74/80
38 89 F2 C7 75/80
39 89 F2 C7 76/80
3A 89 F2 C7 77/80
3B 89 F2 C7 78/80
3C 89 F2 C7 79/80
54 89 F2 C7 80/80
CUSTOM PAINT codes:

PEARL PAINT
COLORS 1-20 (FIRST ROW)

5F 80 0D 08 1/40
20 BD 07 55 2/40
E1 F9 01 A2 3/40
A2 36 FC EE 4/40
63 73 F6 3B 5/40
24 B0 F0 88 6/40
E5 EC EA D5 7/40
A6 29 E5 22 8/40
67 66 DF 6F 9/40
0F BD D4 0B 10/40
D0 F9 CE 58 11/40
91 36 C9 A5 12/40
52 73 C3 F2 13/40
13 B0 BD 3F 14/40
D4 EC B7 8C 15/40
95 29 B2 D9 16/40
56 66 AC 26 17/40
17 A3 A6 73 18/40
D8 DF A0 C0 19/40
F0 91 16 F8 20/40

CHROME PAINT
COLORS 21-30 (SECOND ROW)

B9 74 2E 8F 21/40
7A B1 28 DC 22/40
3B EE 22 29 23/40
FC 2A 1D 76 24/40
BD 67 17 C3 25/40
7E A4 11 10 26/40
3F E1 0B 5D 27/40
00 1E 06 AA 28/40
C1 5A 00 F7 29/40
D9 0C 76 2E 30/40

MATTE PAINT
COLORS 31-40 (SECOND ROW)

F6 11 32 79 31/40
B7 4E 2C C6 32/40
78 8B 26 13 33/40
39 C8 20 60 34/40
FA 04 1B AD 35/40
BB 41 15 FA 36/40
7C 7E 0F 47 37/40
3D BB 09 94 38/40
FE F7 03 E1 39/40
16 AA 79 18 40/40
- Color hashes are the following:
- Contents of CARNAME_<MANUFACTURER>_<FRONTEND_NAME>.ini are the following:
[INFO]
Name = <new car name>- Delete all language files except for the one that corresponds to your game's language before compiling, otherwise your carname won't appear.
Once you have all the files set up, proceed to the next step
Step 2: (Re)Compiling Geometry/Textures and adding the GlobalB/Frontend/Language data
If you're going to add cars with Binary
If you're using CarToolkit to recompile the geometry and textures
Open NFS-CarToolkit and open the GEOMETRY.BIN file you want to recompile by going to File > Open.
Make sure to check that the Export > Config-free when possible menu option is checked and click on the Export tab.

If you wish, set the path of the game's executable (e.g. C:\Games\NFS Most Wanted\speed.exe) in the EXE Path field; otherwise, uncheck the Auto checkbox next to the Output folder field and click on the 3-dot button to select the folder where you want to place the recompiled GEOMETRY.BIN and TEXTURES.BIN files.
In the Export tab, select the Game (Need for Speed Most Wanted), Car type (Racer, Cop, Traffic) and in Car name type the new XNAME for your car (e.g.CHALLENGER)
Click on the GEOMETRY.BIN and TEXTURES.BIN buttons. If successful, it will display a File exported in #ms: <filepath> in green in the log below.
If you didn't set an EXE Path, click the folder button next to the Output folder field to open the folder where your GEOMETRY.BIN and TEXTURES.BIN files are and copy them to the CARS\<XNAME> folder (you have to create it) of NFSMW.
If you're using Recompiler to recompile the geometry and textures
Open the NfSMW - ReCompiler program. This window will show up.

Run the CARS -> <OLD_XNAME> option. If it goes well you will hear a confirmation sound.
With TexEd, open the TEXTURES.BIN file that has been generated and save it to compress it.
Then put the newly generated GEOMETRY and TEXTURES files in the CARS\<XNAME> folder (you have to create it) of NFSMW.Now open Binary and click on Launch Binary for Modders (right big button)

Go to Main > New Launcher

Select your game folder with the Select Directory button, specify the usage to Modder and the game to MostWanted. Click on Save to save the launcher script

Open the launcher file (it has an .end extension) with some plaintext editor (like notepad) and add the following highlighted text. Save the file.

(obviously, if your game is in another language, you have to put the name of the the appropiate language file of the LANGUAGES folder)
Back in Binary, open the launcher file by going to Main > Load Files. You will see a few nodes appearing in the left-side panel

Open the GLOBAL\GLOBALB.LZC node and open the CarTypeInfos node. Click on an existing node and click Copy Node to make a new node from an existing one

Enter the XNAME of the new node and press OK. It will be added to the bottom of the list

Go to the newly selected node. The values we're going to be looking for is in the Primary section. Adjust as necessary.

-
DefaultBasePaint [string]: the stock car color. Values are:
- GLOSS_L1_COLOR## (where ## is any number from 01 to 80 in the color chart below)
- METAL_L1_COLOR## (where ## is any number from 01 to 80 in the color chart below)
- PEARL1_PAINT## (where ## is any number from 01 to 20 in the color chart below)
- CHROME01_PAINT## (where ## is any number from 01 to 10 in the color chart below)
- MATTE01_PAINT## (where ## is any number from 01 to 10 in the color chart below)
- TRAFFIC_L1_COLOR01
- COP_L1_COLOR01
- IsSkinnable [True/False]: Determines if the car uses paintable car skin material or not (racers use the former, cops/traffic the latter)
- ManufacturerName [string]: Manufacturer the car is going to use. Refer to the the NFSMWUnlimiterSettings.ini file for a list of manufacturers.
- MemoryType [Cop/Traffic/Player/Racing/HugeTraffic/BigTraffic]: Determines memory type usage for the car
- UsageType [Racer/Cop/Traffic/Wheels/Universal]: What kind of mesh the car uses
Now open the Collisions node and copy the node from another one like we did in CarTypeInfos

Open the DBModelParts node and copy another node (preferably the one of the car that was being replaced) like we did before

Double-click on the newly created node, this screen will appear

We need to rename all the nodes here to make the add-on model work, to do that in one shot go to Car Parts > Find and Replace, input the XNAME to replace (A4, for this instance), click OK, then input the new XNAME (in this example it would be COROLLA) and hit OK. The next prompt will ask you if you want to make the replace case-sensitive; leave it unchecked and click OK. Now the nodes will have the correct name as shown below

Close the window to go back to the main Binary window
Now open the FRONTEND\FRONTB.LZC node, open the TPKBlocks node and double-click on the FRONTENDTEXTURES (or DEFAULT, if you modified the FrontB with TexEd before) node. The following window will appear.

Go to Texture > Add Texture and open the secondary logo .dds file. In the next prompt input the name of the texture, which in this case would be SECONDARY_LOGO_<XNAME>, like in the example below and click OK:

Do the same for the manufacturer logo if the mod already had one has one, the name for those are CARSELECT_MANUFACTURER_<MANUFACTURER> (i.e. CARSELECT_MANUFACTURER_FERRARI). Close the window to get back to the main window.
Open the LANGUAGES\English.bin (or whatever language file you picked), open the STRBlocks node and double-click on the GLOBAL node, this window will open:

Go to String > Add String. In the following dialog put the car name label name in Label (CARNAME_<MANUFACTURER>_<FRONTENDNAME>) and the label text, as shown in the pic below and click OK

Close the window to go back to the main window
If the mod uses special spoilers, you can set them up by going to GLOBAL\GLOBALB.LZC > SlotOverrides and adding/copy one of the existing nodes to set it.

Once you're done, go to Main > Save Files to save changes
If you're going to add cars with Ed The Car Dealer (deprecated method)
Open the NfSMW - ReCompiler program. This window will show up.
Run the CARS -> <OLD_XNAME> option. If it goes well you will hear a confirmation sound.
With TexEd, open the TEXTURES.BIN file that has been generated and save it to compress it.
Then put the newly generated GEOMETRY and TEXTURES file in the CARS\<XNAME> folder of NFSMW.
Next, open Ed, select Main > Open and open your NFSMW folder. You should see the .ini file corresponding to your car. To add it, just click on the "Add Cars" button and you're done.
If you're going to add cars with ReCompiler (even more deprecated method)
Open the NfSMW - ReCompiler program. This window will show up.
Now proceed to run the following options:
- FRONTEND > FRONTEND
- GLOBAL > GLOBALB
- LANGUAGE
- CARS > [OLD_XNAME]
With TexEd, open the TEXTURES.BIN file that has been generated and save it to compress it.
Now put the files in their corresponding game folders (don't forget to make backups first!)
- GLOBALB.BUN/.LZC -> GLOBAL
- FRONTA.BUN -> FRONTEND
- <LANGUAGE>.BIN -> LANGUAGES
- GEOMETRY.BIN, TEXTURES.BIN -> CARS\[XNAME]
Step 3: VLT Editing
Open VLTEd and go to File > Open; select your NFSMW folder. You will see the VLT nodes like this: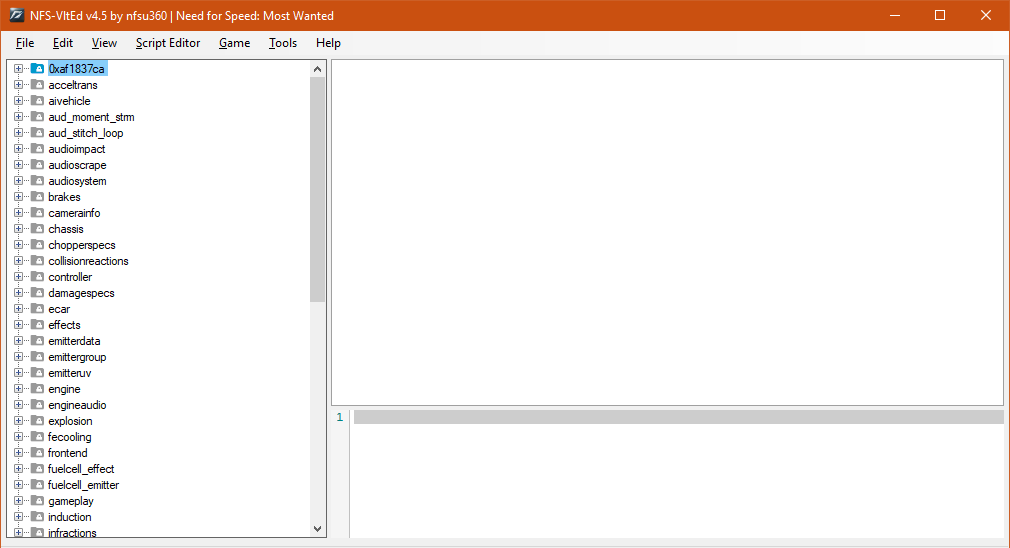
You will need to create new nodes for the addon car, but it's better to copy an existing one since creating a new one is rather buggy. And since we're dealing with a car from modloader, it's better to copy them from the original car it's replacing. Normally that would be a tedious process, but I prepared a script that will cut some work; just copy and paste the following script into a text editor (Notepad will do), replace the bracketed names as suggested (for example, <added_xname> to mustanggt and so on) and save it as <addon_car>.nfsms:
copy_node brakes <original_xname> default <added_xname>
copy_node brakes <original_xname>_top <added_xname> <added_xname>_top
copy_node chassis <original_xname> default <added_xname>
copy_node chassis <original_xname>_top <added_xname> <added_xname>_top
copy_node ecar <original_xname> racers <added_xname>
copy_node frontend <original_manufacturer> <region> <added_manufacturer>
copy_node frontend <original_xname> <manufacturer> <added_xname>
copy_node engine <original_xname> default <added_xname>
copy_node engine <original_xname>_top <added_xname> <added_xname>_top
copy_node induction <original_xname> default <added_xname>
copy_node induction <original_xname>_top <added_xname> <added_xname>_top
copy_node pvehicle <original_xname> racers <added_xname>
copy_node tires <original_xname> default <added_xname>
copy_node tires <original_xname>_top <added_xname> <added_xname>_top
copy_node transmission <original_xname> default <added_xname>
copy_node transmission <original_xname>_top <added_xname> <added_xname>_top
copy_node camerainfo <original_xname>_hood hood <added_xname>_hood
update_field pvehicle <added_xname> MODEL Visual <MODEL_XNAME (IN ALL CAPS)>
update_field pvehicle <added_xname> MODEL Collision <MODEL_XNAME (IN ALL CAPS)>
update_field pvehicle <added_xname> MODEL Collision64 <MODEL_XNAME (IN ALL CAPS))>
update_field pvehicle <added_xname> transmission[0] Collection <added_xname>
update_field pvehicle <added_xname> transmission[1] Collection <added_xname>_top
update_field pvehicle <added_xname> tires[0] Collection <added_xname>
update_field pvehicle <added_xname> tires[1] Collection <added_xname>_top
update_field pvehicle <added_xname> induction[0] Collection <added_xname>
update_field pvehicle <added_xname> induction[1] Collection <added_xname>_top
update_field pvehicle <added_xname> frontend Collection <added_xname>
update_field pvehicle <added_xname> engine[0] Collection <added_xname>
update_field pvehicle <added_xname> engine[1] Collection <added_xname>_top
update_field pvehicle <added_xname> chassis[0] Collection <added_xname>
update_field pvehicle <added_xname> chassis[1] Collection <added_xname>_top
update_field pvehicle <added_xname> brakes[0] Collection <added_xname>
update_field pvehicle <added_xname> brakes[1] Collection <added_xname>_top
*some induction nodes have _base attached to it, that's for cars that don't come with turbo/supercharger, in that case the nodes related to induction will be the following:
copy_node induction <original_xname>_base default <added_xname>_base
copy_node induction <original_xname>_top <added_xname>_base <added_xname>_top
update_field pvehicle <added_xname> induction[1] Collection <added_xname>_base
update_field pvehicle <added_xname> induction[2] Collection <added_xname>_top
**some induction nodes have only the _top node, mostly for high-tier cars, in that case the nodes related to induction will be the following:
copy_node induction <original_xname>_top default <added_xname>_top
update_field pvehicle <added_xname> induction[1] Collection <added_xname>_top
*** if you're adding the car GLOBALB entry with Binary or Ed, set the <XNAME> in the Collision and Collision64 lines as the XNAME of the added car. If you're adding the car GLOBALB entry with ReCompiler, you have to change the Collision and Collsion64 lines to another original car XNAME; your car might float above/sinking on the ground so it might take a few tries to get it right.
Back to VLTEd, import the .nfsms file with File > Import > ModScript. Click Install in the following dialog.
Next, import the the FE.MWPS file of the modloader car with File > Import > MWPS. Click "Import", then OK. You will see the script editor pane (lower right quadrant) now has some commands, but we need to make a slight change: delete the line that contains "manufacturer" since that has to be taken care later (if there is any).
Now import the ATTRIBUTES.MWPS file. However MWPS import is not perfect and you will notice there might be some errors as noted in the import results window; scroll down to check what those might be.

For example, here it says "No value has been found at offset"; in this case it refers to the gear count value in the transmission node, which can be fixed by right-clicking on the car's transmission node, selecting "edit fields" and changing the GEAR_RATIO count to the desired value. Also some values like the copspeech and engine/turbo sounds might not be imported at first; you could either check if those have any other type than dword next to patch in their lines in the MWPS file in Notepad and try importing it again or change them manually in VLTEd
Click OK, then copy the contents of the script editor and paste them into a text editor. Replace the xname of the original car for the addon car, copy the whole thing; open the .nfsms file with the text editor and paste the copied script at the bottom of script file, save the script.
Back to VLTEd, reload the file to undo changes and import the script again. Now, change the missing values (engine/turbo sounds, copspeech, etc.) if any and then go to the frontend node of the added car (and added manufacturer, if there is any). For versions of Unlimiter previous to v4, set the manufacturer number according to the Unlimiter list in the .ini (you can add manufacturers to the ini file and use them as well).
Once when you're done, save, export the script (overwrite the old one) and clear the script editor window. Now try out your new add-on car by creating a new save! (or by patching an existing save -see below-)
Optional step 1: Vinyls
If the car came with vinyls, you can convert those for addon use.
Using Binary
Load the launcher file you made before if you haven't and load the VINYLS.BIN file you want to use by typing new negate <path to your VINYLS.BIN file> (e.g. new negate CARS\CIVIC\VINYLS.BIN or new negate "C:\My Files\VINYLS.BIN"), in the script pane (the bottom right panel), then press F5 to load it.
Open the VINYLS.BIN you loaded and open the TPKBlocks section and select the node on it. Change its CollectionName value to <XNAME>_VINYLS (e.g. CAVALIER_VINYLS), then click on Open Editor or double click on the node

In the Editor window, go to Options > Find and Replace, enter in the "search for field" the XNAME you want to change, click OK; then in the "replace with" field type the new XNAME you want to use, click OK. In the following dialog you can leave the "make case-sensitive search" option unchecked, and click OK. You will see the names of the vinyls changed.

However, in some cases not all vinyls will change name properly through Find and Replace; sort the vinyls by name by click on the CollectionName headed and check if there are names that are either unchanged or truncated; fix their names by selecting them and changing their CollectionName value. Close the editor window when done.
To save the file, type delete <path to your VINYLS.BIN file> in the script pane and press F5. Keep on mind this might take a few minutes, so don't panic if you see Binary freeze in the meantime.
Using TexEd & AntRenamer (deprecated)
First export the vinyls with TexEd to a folder. Then open AntRenamer and add the folder containing the exported vinyls.
Then click on "Actions", go to "String replacement", in "Search for" put the XNAME you want to change and in "Replace by" put the new XNAME you want to use (in this example PUNTO vinyls are converted to SENTRAB13)

Click Go and check if all the files were renamed correctly, correct if neccessary.
Download this vinyls_base file, rename it to vinyls.bin and open it with Tex-Ed. Go to Texture > Add from folder, select the folder containing the vinyls and click OK. Save the file (it might take a couple of minutes) to finish.
Optional step 2: Patching save to use add-on cars
In case you're not in the mood to make a new save every time you add a new car, you can patch an existing save file. Keep on mind to make a backup of the original save because you cannot remove cars from save files. Also, it will break existing cars in My Cars, Career Garage and Bonus Cars in versions of Unlimiter prior to v4.
Unzip the Save Patcher to a folder. The folder structure should be like this

And the contents of the <XNAME>.ini file are the following:
[MAIN]
frontend = <hashed frontend name>
pvehicle = <hashed xname>
You will need NFS-Hasher to hash the frontend and xnames. Open it up and in the "Input Text" field type the frontend name, then click the "Copy" button next to "VLT File". Paste the hashed name in the frontend and remove the "0x" in front of it. Do the same for the xname/pvehicle line and save.
Now run the NfSMW - SavePatcher program, open Patch Save and click on the save you want to patch. You will hear a confirmation sound if done correctly.
Finally, open the NFSMW Save Editor, open the patched save and save it to make it work. You're done!
Hope you found this tutorial useful, cya!